Showing posts with label tutorial. Show all posts

10 July 2011

Candy (Snack) Bag Pouch

As many of you had noticed, I love taking completely useless things you would normally throw out and transforming it into something useful!

I'm sure many of you enjoying eating sweets and snacks, right? Have you ever thought of what you could do with the bag once you've finished devouring the treat? How about a pouch to store miscellaneous items? It is also a great way to help the Earth by being environmentally friendly!

Here is a collection of Japanese plum candy bags I've collected over the months from a generous donor. Any candy bag or chip bag will do. I decided to use four bags: two bags for each side of the pouch. This will also depend on the thickness of the bag as well, but I would recommended to go no further than two bags for each side (it will be too hard to put things into the pouch due to the thickness).
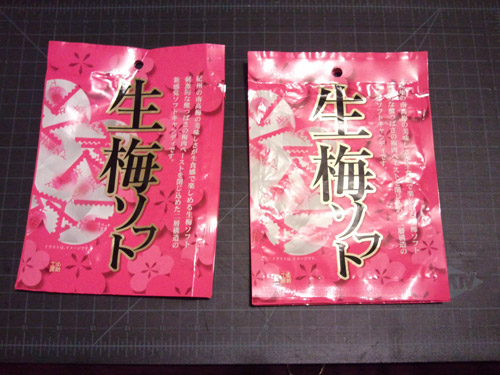
Candy Bag Pouch

This project does require a sewing machine because manual labor is going to put your hands into a world of fatigue! You can try using a glue gun or E6000 craft glue, but I'm not sure how well that will work. You will also need to purchase a zipper which can be found at any craft/fabric store.
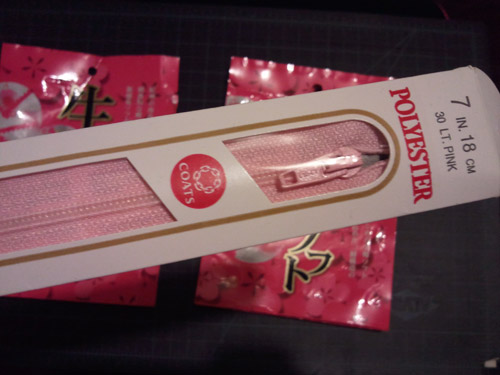
Candy Bag Pouch

I decided to use find a video tutorial on how to sew on the zipper as it it difficult to explain in writing. The tutorial I found on youtube does a great job of explaining how I sewed on the zipper.

Click here for video

After completing the pouch, I decided to use Japanese packaging tape to "decorate"/hide the rips on candy bags.
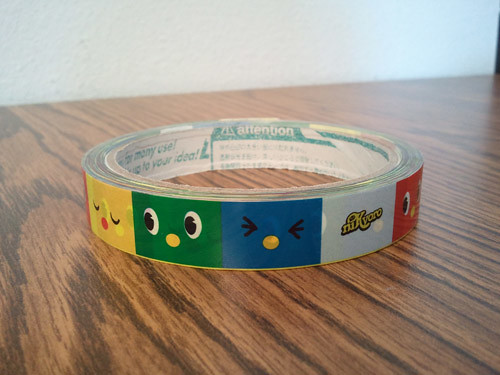
Candy Bag Pouch

This is what the final product looks like! This would also be a great alternative to put these bags to use instead of throwing them away to sit in land fills.
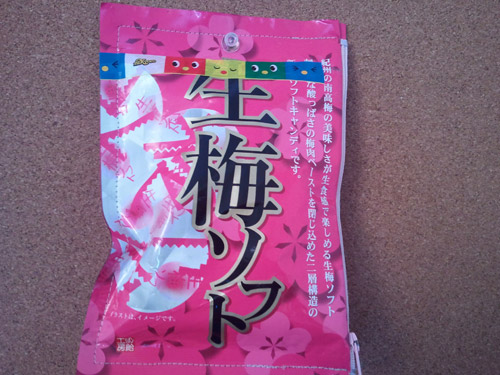
Candy Bag Pouch

I also provided a snapshot of the inside just for viewing purposes.
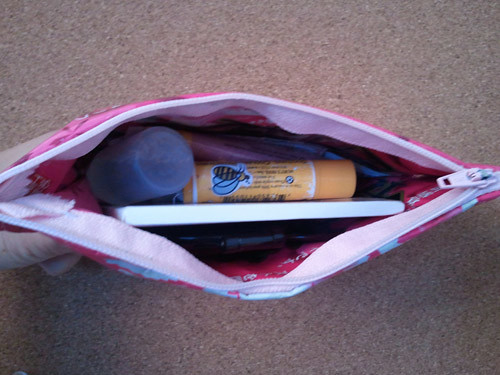
Candy Bag Pouch

Thanks for reading and please tell me what you think! :)

05 March 2011

Sunglasses case recon w/ small tutorial

In celebration of March as National Craft Month, I decided to focus more on DIY's and Recons! Which is totally fine with me because I haven't had time for a proper manicure! I originally tried to do a tutorial with this project, but for some reason it didn't work out...(hehe). So, this is somewhat of a tutorial but the photo process is lacking.

Sunnies are another one of my obsessions! I love sunglasses and I also love buying them, but not all of them have cases! Since I'm trying to not spend excessively, I decided to do a recon with what I had laying around. I came across a Fucci (Fake Gucci) sling bag that I got as a gift, sitting in my closet collecting dust. I saw it as a recon opportunity. Unfortunately, I didn't take a picture of the bag before I tore it apart, but that's okay. :)

Since this is a recon, this is going to be an easy and a quick project because everything is already pre-cut. (which I love about recons!)

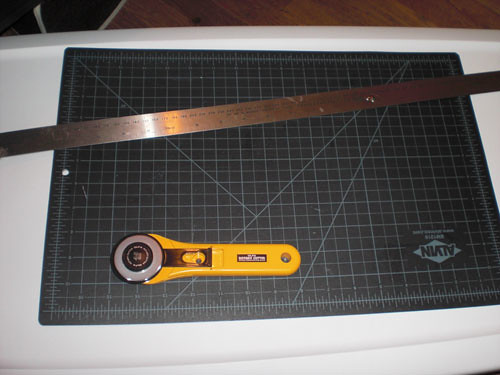
Sunglasses Case Reconstruction: Tools
Step 1:
Proper tools are very important when it comes to crafting (at least in my opinion). I used a self-healing mat, rotary cutter, metal ruler and a sewing machine (not pictured here). You can also hand sew, if you have the patience.

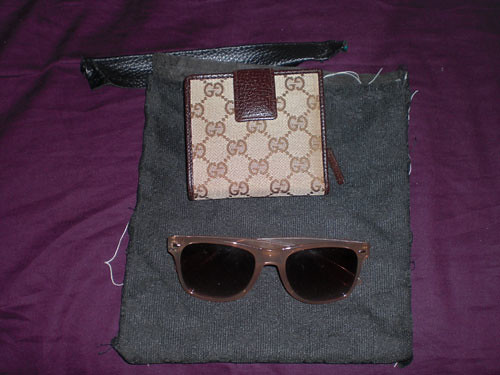
Sunglasses Case Reconstruction: Materials
Step 2:
Materials are just as important as tools, as you need them in order to create your desired project. :) (I included the Gucci wallet for comparison with the Fucci print. :D)

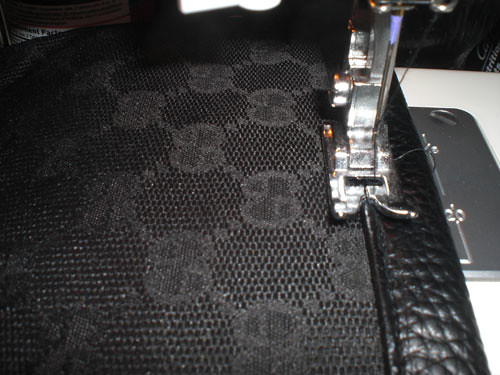
Sunglasses Case Reconstruction: Sewing it together
Step 3:
Sew on the border to: (1) make it look good and (2) to minimize the fabric fraying. If there is no border, then you can fold the fabric down to create a border.

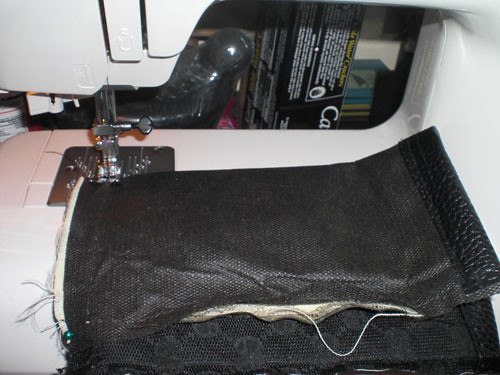
Sunglasses Case Reconstruction: Sewing with wrong side facing up
Step 4:
Be sure to measure the dimensions of your sunglasses to make sure they will fit. Fold the fabric in half and sew according to what you measured with the wrong side facing up. The wrong side is the side that will be facing inside of the case (as shown in the photo)

Completed Sunglasses Case Reconstruction
Step 5:
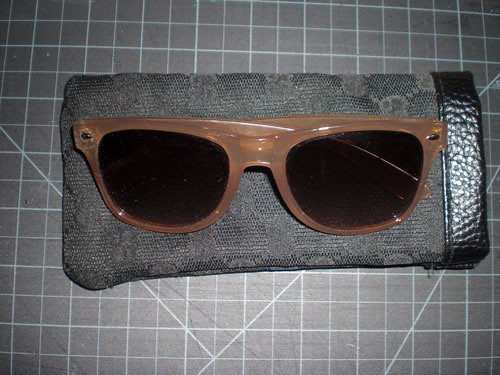
Flip the case inside out, use and enjoy!

I hope this tutorial made sense and should you have any questions please do not hesitate to ask!


27 February 2011

Magazine Rack with tutorial

I got tired of watching my growing magazine/catalog stack in the corner. So, I've been on the hunt for the perfect magazine rack and just couldn't find "the one".

I was sitting my room watching television the other day and my eyes landed upon some boxes sitting in front the stand that I was planning to use in future projects. I had also just purchased a few items from a vintage shop that were packaged in a really neat paper bag. It was just the inspiration I needed.

This is a fun and DIY using most items that you would probably have in your home already. Its also a great way to be eco-friendly! I try to use items that I already have to save myself money.


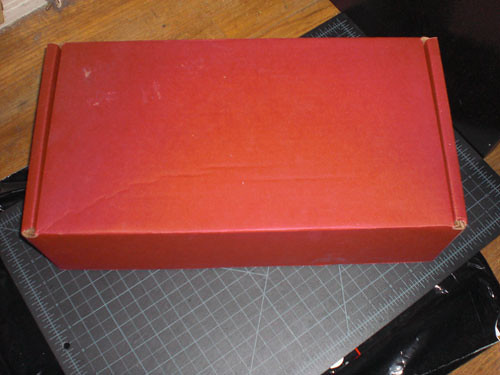
Step 1: Start with a cardboard box
Step 1:
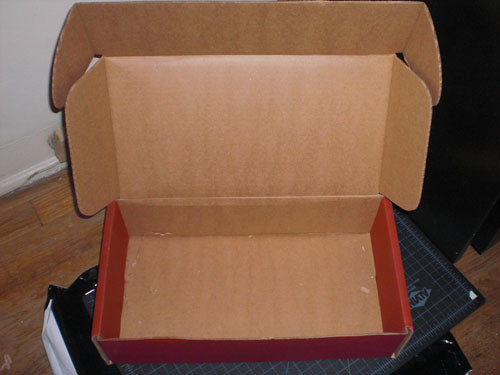
Start with a cardboard box. Any box will do, mine just happen to have a lid with it. A good medium to large shoe box will do too.

Step 2: Cut off the lid
Step 2:
Cut off the lid. If your box happens to be a regular shipping box, you can cut off the flaps.

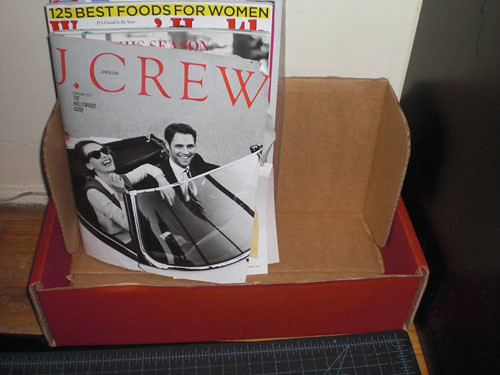
Step 3: Place the lid into the box to make a backing/stand
Step 3:
After cutting off the lid, I placed the lid back into the box to make a backing/stand for it. (I hope this made sense, it is hard to describe this step and I'm sorry that I didn't take better pictures of this process)

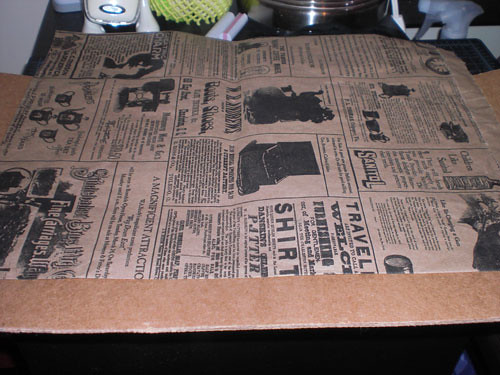
Step 4: Use some decorative paper or newspaper!
Step 4:
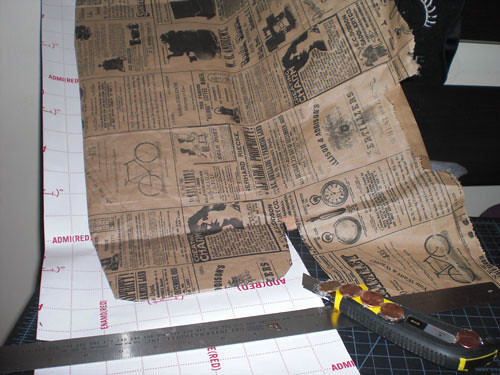
Use some decorative paper, scrap booking paper, wrapping paper and or newspaper! (I would recommend to use several layers since its so thin). This is the really neat paper bag I got from the vintage boutique I mentioned earlier.

Step 5: Wrap the decorative paper around the backing/stand
Step 5:
First, take the backing/stand and wrap the front side of it (the side that will be facing you) using your decorative paper with glue and or tape.
Second, also wrap the back side of the backing/stand. You can use the same paper print or a different one. I chose to use some old wrapping paper (inspiration from my Storage Box post).
If you are using the standard shipping box, all you need to do is wrap the inside first and then proceed to wrap the outside (You will be done after this step).

Step 6:Wrap the entire box with wrapping paper
Step 6:
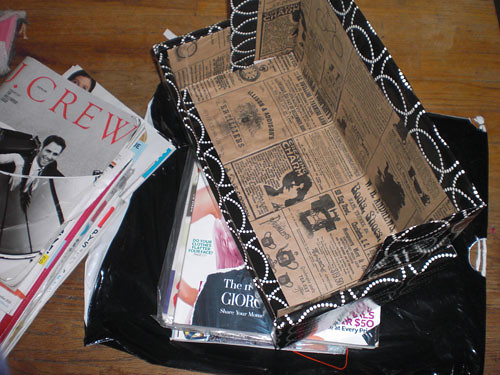
Continue to wrap the bottom part of the box (wrapping the inside first and the outside last). Place the backing/stand into the bottom box. Now I found that the backing/stand can hold well without glue but I chose to use a hot glue gun to reinforce it, just in case.

Step 7: And you're done! A regular cardboard box constructed into a magazine rack!
Step 7:
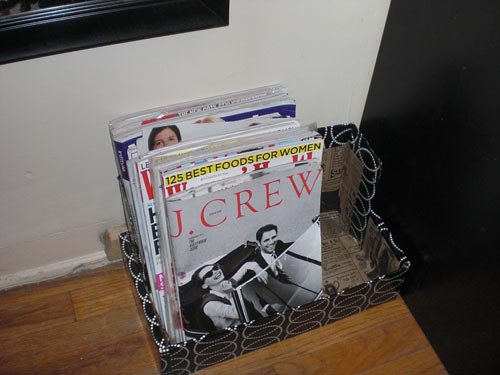
Place your completed handmade and eco friendly magazine rack at a desired location and enjoy!

I hope this tutorial made sense. I know the process images aren't that great. Sometimes when I'm doing these projects, I tend to forget to take pictures because I'm in deep concentration. Should you have any questions, please do not hesitate to ask questions and or contact me.

11 February 2011

Swift Cheetah Manicure Tutorial

I have a simple nail design tutorial for you today! My apologies, I have been busy for the past few weeks. The weekends are the days I really get to rest and believe me, I do rest and get lazy!

Swift Cheetah Manicure

I did this manicure a while ago, but never got the chance to post it up. I love having animal prints on my nails.The pros are that it is completely vegan and there is no hurting of animals involved! Yeah, I know I'm a nerd. :) I also did a fierce tiger nail design sometime last year if you want some more ideas for animal print manicures.

Swift Cheetah Manicure
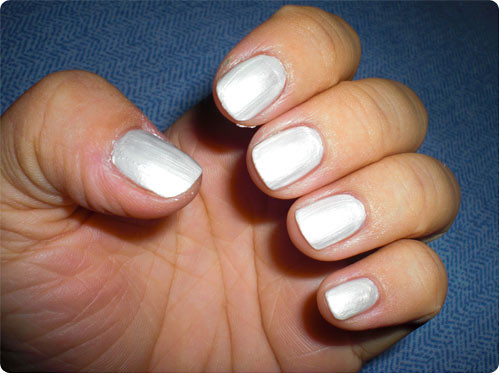
Step 1:
First start with a base color. I used Elf's Pearl, which is a shimmery white that almost looks silver. In my opinion, it is not a great color to use by itself, but great for nail designs.

Swift Cheetah Manicure
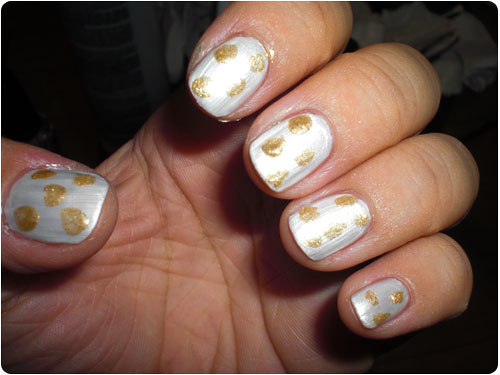
Step 2:
Add some random dots which will serve as the Cheetah's spots. I used Rimmel's 521 Dazzle ( I think that is the name). It is a gold glitter, which I also use primarily for nail designing as I find the color too overwhelming.

Swift Cheetah Manicure
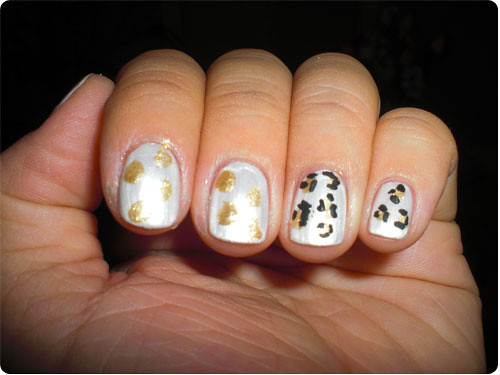
Step 3:
Then add another set of random dots (about 3 as shown in the picture) around the gold dots. I used a black striping paint. You can also use black polish, but use it sparingly as you don't want too much polish on the brush when you're dotting. Just remember that these dots do not have to be perfect circles as we want to achieve an organic look.

Swift Cheetah Manicure
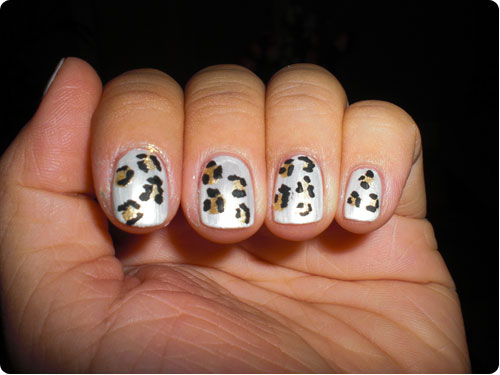
Step 4:
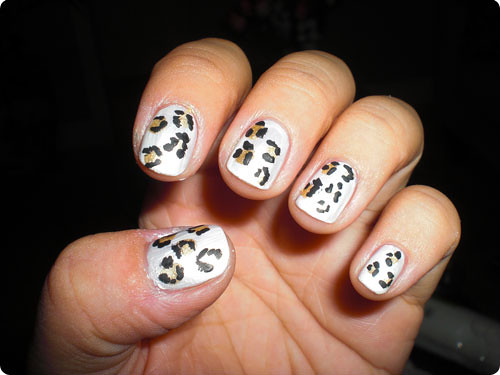
This is the completed look after all the dots have been applied.

Feel free to play around with a color scheme. I just chose to use gold and black to achieve a realistic Cheetah look. Was the tutorial easy to follow? Please tell me what you think. :)

*Special shout out to Kat. I love the color combo of polishes you put together! Let me know when you're back in town and I'll "Hello Kitty" those nails for you! :) *

25 January 2011

Dark Red French Tips with Red Glitter (Gradient Effect) with a small tutorial

I want to clarify something first: the integrity of this manicure and condition of my hands greatly diminished as I was taking these photos. I underestimated the drying time of the top coat before smashing my hands into my boxing gloves for my Boxing class. Since I have sensitive skin on my hands, all that punching reeked havoc on them. Please bear with me. :(

After seeing several of 'Chelle's French tip gradient manicures: here and here. I was feeling quite inspired to create my own without having to purchase any new polish! I decided to sorta make a small tutorial just in case there would be any questions as to how I did the gradient effect.

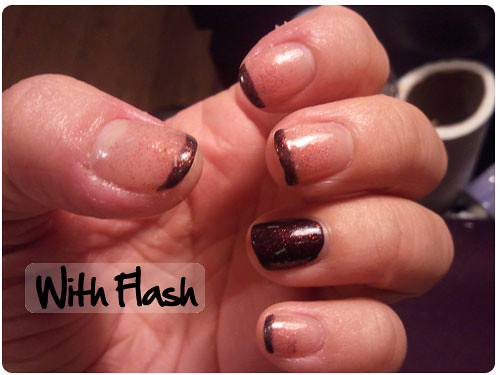
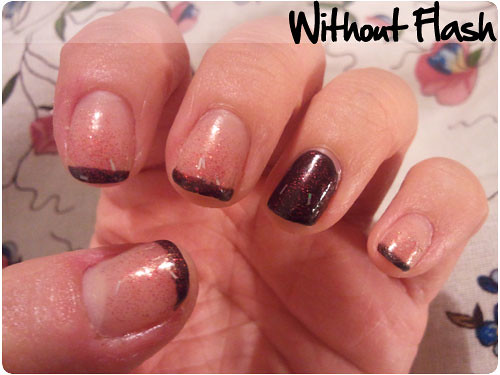
I decided to take pictures with flash and without flash because as you know, flash makes a huge difference on the actual color of the polish and the manicure as a whole.

Nail Design with Flash

Black French Tip with Red Glitter
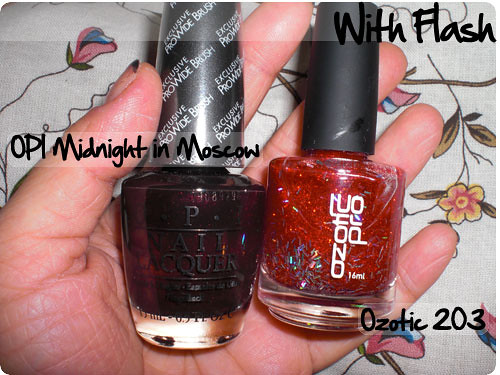
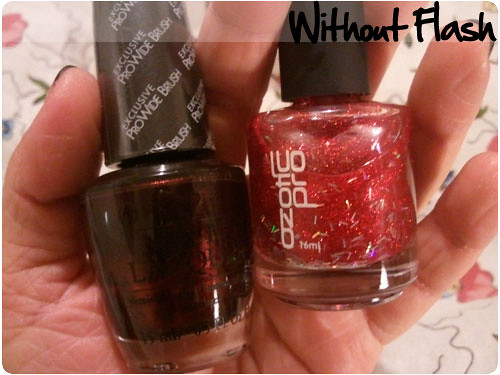
  • Dark Red French Tips (looks black): OPI's Midnight in Moscow (Swiss Collection). This is an extremely dark red color when it is in the bottle. I noticed that when I painted it on my nails, it was more of a black with red glitter in it.
  • Red Glitter : Ozotic's 203 (which I got from 'Chelle from our Swap. Thanks again!). This is sheer red glitter with silver strips? or flakes? Not sure what they are called. Very pretty color though.
  • Nude Glitter: Essie's Cool-Lots. I totally forgot to include this polish during the photo shoot! It is an extremely sheer nude glitter polish which I mainly use as a polish topper.
polisheswithflash

As you can see with the flash, you get a better picture of how dark the OPI Midnight in Moscow is. But with the flash, the red of the Ozotic Pro 203 is just a little too bright.

OPI Midnight in Moscrow & Ozotic Pro 203
However, without the flash Midnight in Moscow looks reddish-brown and 203 is more on par with what the color really looks like.

ozoticzone_flash

This is just a close up of Ozotic Pro 203, you can see the little silver strips/flakes which I must say is what I love about this polish (besides the fact that it is a glitter polish). As you can see, the flash makes the red super bright!

Now here comes the small tutorial: How to create the "Gradient Effect".

How to do the Gradient Effect

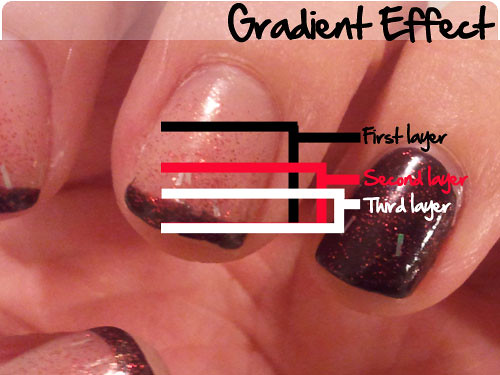
So what I did here was create guidelines to show where you are suppose to apply the glitter polish. They are pretty self explanatory: first layer goes on first (black area), second layer goes on second (red area) and third layer goes on last (white area). Make sure to let each layer fully dry before applying!

I hope that small tutorial made sense! You can easily re-create this look any sheer glitter polish for your French Tip manicures. Let me know if this works out for those of you who tried this small tutorial!

Thanks to 'Chelle for the Ozotic Pro 203 and the inspiration to create this manicure!

14 August 2010

Moccasins with a personal twist!

I know it has been a while since I last posted, but with good reason! I have been keeping myself busy with another project!

I was browsing around Michael's one day and came across a DIY: Moccasins kit. I thought it would be something fun to keep myself busy with. It was about $15.99, but since I had a coupon it only cost me about $10 dollars or so with tax.

mocs1

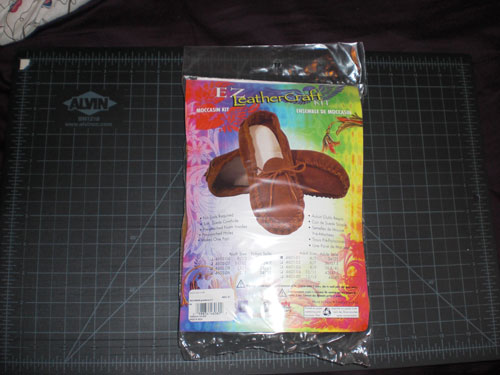
This is what the kit came with:

moc2

When completed:

mocs-before

Upon completion, I felt that the final project lacked serious character and wanted to do something more. After browsing through much online tutorials and YouTube videos, I came across Katie's Darlingtonia Moccasins. This was just the inspiration I needed. Although love her Moccasins very much and would LOVE to purchase one, I don't have the financial means to do so as of now. But I will be purchasing a pair in the near future.

I drove back to Michael's again in hopes of searching for something that would give my Moccasins what it needed and I found this:

string

Who would have known that leather jewelery would go a long way!

mocs-side

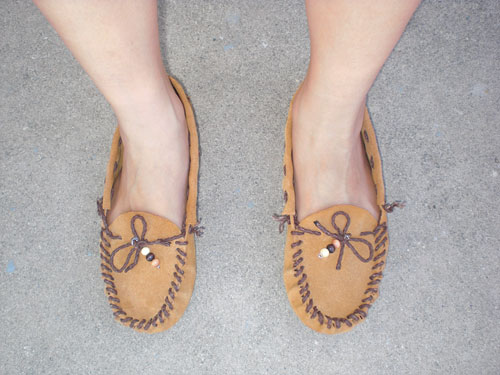
I added some embellishments so it wouldn't look so plain. These beads were sitting in my arts and crafts bin for a long time and figured it would be the perfect opportunity to use them.

mocs-facedown

A side view of the Moccasins.

moc-closeup

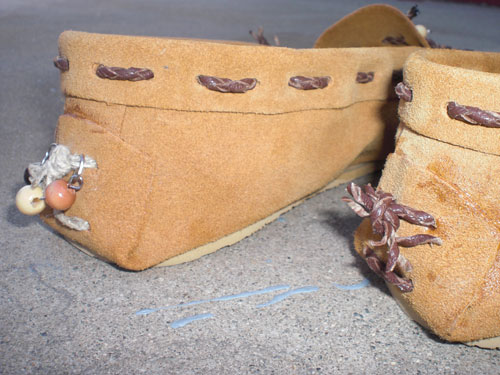
As you can see, the stringing on the left Moccasin is different from the right because I ran out of string and didn't want to go buy more if I only need such a small amount. Kevin suggested that I put a charm on the back of only one shoe to make it unique and I do say that it looks good.

moc4

So here you have it, a completed Moccasins project. I hope this will inspire you to go out and make your own or to purchase one from Katie because her Moccasins rock!


Photobucket


*Side Note*: I also wanted to mention that these Moccasins kit didn't have soles on the bottom of the shoes, so I went to a local shoe repair store and had one slapped on.

20 July 2010

How to make your own Storage Boxes! w/ a small tutorial

I thought that this might be a fun idea to share with all of you. First things first, I am your typical girl with tons of shoes (which includes the boxes) and wrapping paper. Since Ikea has practically become my second home for these past few weeks, their wonderful storage boxes caught my eye. But I just couldn't bring myself to spend such money on an item that I thought was somewhat overpriced for a cardboard box. Since I am a huge advocate of being eco-friendly and recycling, I decided to wrap my old shoe boxes with old wrapping paper to make my own storage boxes. It's not really great but its a fun small project to do when you're bored or want some storage boxes! Its also a great way to reuse resources and save money. Make sure that the boxes you are going to use are ones with the detachable lids (as shown in my photos). They are easier to wrap and more practical than ones with the attached lids.

What you're going to need, depends on how precise you want the size of the wrapping paper to be. If you don't care and prefer to go gung-ho then all you're going to need is a glue stick and scissors. But if you are detailed orientated like myself (basically OCD), you'll need scissors, a ruler, xacto knife, and a glue stick. If you are going to use an xacto knife, make sure you have a self-healing cutting mat (like the one featured in my third photo) so you don't damage any surface area you may be working on. I also recommend using a glue stick (Scotch brand because it its really sticky, but any glue stick will do too) because it will give you a better consistency compared with liquid glue. I know one my photos has liquid glue in it, but don't use it unless you want streaks to show up on your storage boxes.

I apologize for the first few photos as they are really grainy and yellow-tinted. Don't know what happened there. Please tell me what you think! :)
wrappingpaper

shoeboxes

shoebox2

wrappedshoebox

26 February 2010

Domo-Kun pocket mirror

Here is a pocket mirror featuring Domo-Kun. Yes, I know I have a lot of posts about him but he is just too cute!

I know the pictures don't really capture the process it took into making this, but I "got so in to it" while I was making it at times, that I would forget to take pictures.

enjoy <3 src="http://img.photobucket.com/albums/v296/watashiwaarisu/project%20blog/domomirro-step1.jpg" border="0" width="500" height="377">


Materials used: felt and craft mirrors.

25 February 2010

Valentines' Day Inspired Manicure


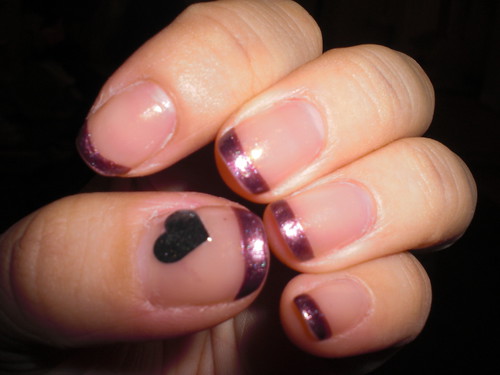
This is manicure I did for Valentines' day. I know the integrity of the manicure is bit worn out as I had been wearing them for a week before I took this photo. It is something simple and not too complicated.

I used a swatch from OPI's Hong Kong collection, Meet Me on the Star Ferry. It is a purple shimmer, absolutely stunning. Not to mention my favorite as well! I applied two layers on to the tips for optimum color. Then I applied another two coats from Essie's Cool Lots. It is an extremely sheer peach nude color.

I usually free hand the designs on my nails but I was feeling quite lazy that day. Since my sister is into scrap booking, I took one of her heart shaped paper stampers and punched out a small heart. The paper I used was somewhat thick and sturdy so I applied some water to soften it. While my nails were still wet from the Cool Lots coat, I applied the heart punch out. As it dried, I applied top coat and especially on the thumb to reinforce the heart.

Thanks to my muse, Asami for inspiring this design! :)

14 August 2009

A Gift for a Future Bride

I know it has been a while since my last update. I have been busy vacationing and make new projects. Sorry for the lack of updates as I am having computer problems. I had to borrow Kevin's computer to upload my pictures, do some editing and blogging.


The reason why I am doing this project is because Kevin's cousin is getting married on September 6th. I am making her several items for the wedding. One of them is a garter belt. Since one of the color themes is eggplant purple I decided to go with a light purple satin to contrast with the deep purple. This is what I came up with...


I have horrible photography skills so the pictures don't look too good. Sorry! :|

Materials used: satin, thread, threading needle, elastic, lace and ribbons